Now, what to bring?
This is where camping takes its form and can become a stomach turning expense – there are a million contraptions out there. If you don’t have all the gear, that’s perfectly fine. Remember, the outfitter you’re renting your solo canoe from should be able to square you away with anything you may need. What I’ve done over the years is to pick up one or two high quality items prior to each trip I go on. Whether it’s a new sleeping bag or a spice container, they both will serve their purpose for decades to come.
If you want to get gear on your own, the first items I’d suggest would be to focus on keeping your gear dry. Most will probably get wet due to portaging, rain, etc. Keep your clothes, sleeping bag, and food dry by investing in some dry sacks. Trust me, there are few feelings that surpass putting on a dry pair of clothes or swaddling up to a dry sleeping bag after days of constant rainfall. They’re also fantastic to use as your food bag you hang from a tree (to keep pesky critters away). Most compress gear down to nothing so it makes it much easier to pack. Anyway, keeping key items dry is critical, not only to help you remain comfortable, but it’ll also is a huge psychological boost to your morale.
Speaking of comfort and morale, the other essential gear items you should focus on are centered around your well-being. Consider what activities you’ll be doing the most. A large chunk of each day is devoted to sleep. Not only do you spend a large fraction of your day doing it, it’s also vital for your body to rejuvenate. Invest in a quality air mattress (look to spend at least $100) – I went with the Nemo Astro. Not only will it be almost, if not better, than your own bed, but it’ll provide insulation when temperatures drop overnight. It’ll also keep you and your sleeping bag dry when condensation forms in your tent (morning dew) and/or if you have to endure a rainstorm.
If you’ll be soloing in a canoe, the rest of your day will be devoted mostly to sitting in either your canoe or around camp. Do your back a massive favor and get a canoe chair that has a built in frame like this GCI Canoe Seat. Unlike the average canoe chair that doesn’t have a frame, it’ll provide essential support while you’re paddling and provide some comfort when you’re fishing and lounging around the campfire. Yep, it’ll even double as a camp chair to keep your butt dry in the morning when all the dew forms on the ground and logs around the fire grate. $40 for this is money well spent due to how versatile it is!
If you’ll be soloing on the hiking trail, an actual camp chair will be a wonderful luxury to kick back during meal breaks on the trail and also around camp in the morning and evening. I picked up the Alite MayFly for its lightweight versatility. It sits lower than most so it doubles as perfect chair for sitting in the middle of a two person canoe – a lower profile gives you a better center of gravity so you’ll be less prone to tipping the canoe (it’s feet are rubber so it won’t scratch the Kevlar or carbon fiber bottom). I also use it for turkey hunting as it sits low enough to be as inconspicuous as possible but also gives you the luxury of resting your gun on your knee to steady your aim at a boss tom. It sets up pretty quick too (takes about 15-20 seconds). The only drawback is that due to it sitting so low, it can be a little challenging to get out of. I usually just tip slightly to the side and find getting up not too difficult.
Speaking of low, consider keeping a minimal footprint up there – the epitome of the wilderness cardinal rule: Leave No Trace. No trash, no trace. Most of our trash will come from food and beverages. Cans aren’t allowed up there, so it’s best to pick up a plastic flask and fill it with your favorite spirit for a nightcap.
Do yourself and the Leave No Trace rule a favor and pick up some freeze dried meals. They’re lightweight, pack easily, and are incredibly convenient – just add hot water and you’re eating in 10 minutes. The bonus is you can eat right from the pouch it came in, so your trash should be minimal. I’ve tried numerous brands, and the only one I go back to is Mountain House. You can purchase from their site and from any outdoor retailer. They’re, hands down, the best when it comes to bringing home cooking into the outdoors.
Speaking of hands, bugs are also an issue, so let’s chat quick about how to avoid the need to swat at everything buzzing around you. Bugs have driven out one of my friends from his first solo trip because of how bad they were – seriously it can get that brutal up there. Get some Permethrin for your clothes, tent, and backpack. Pick up some Ultrathon to apply on exposed skin. For more details about them, see what I mentioned in an earlier post: Essential Gear For Moreling.
I’ll spare you with gear recommendations for everything. Those listed above are crucial for making your trip comfortable. If you’re comfortable, you’ll be less sore and exhausted. I don’t know about you, but I sure as hell don’t think as right when I’m in either states. There is something to be said about enduring. Trust me, you’ll be tested. I’d just prefer to be challenged by the fight from a six pound smallie than being wet, cold, and miserable.
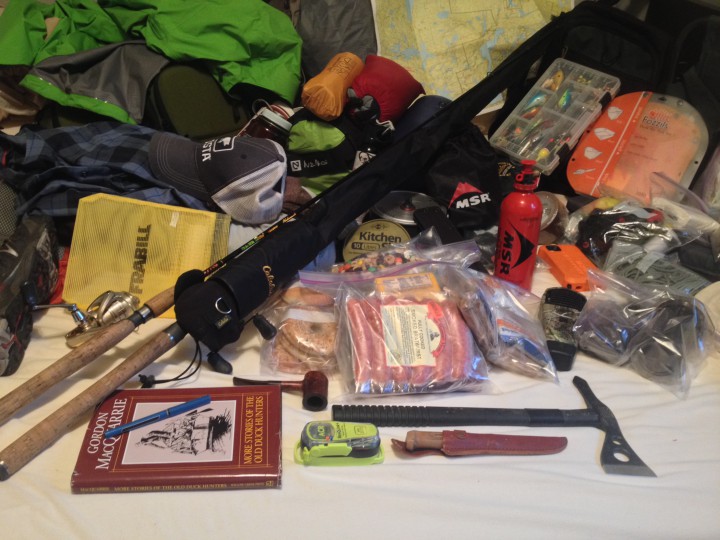
Speaking of testing, now is a great time to pulling out all your gear from storage and putting them to the test. Avoid unnecessary surprises. There is absolutely no sense in just mindlessly tossing your gear in your pack only to realize that it doesn’t work when you’re halfway into your trip – you’re just carrying dead weight. All of my clothes I inspect and then spray with Permethrin. Sleeping bag, sleeping pad, tent, emergency tarp, etc. I check for rips and holes. All battery and fuel powered items are tested for effectiveness as well.
While everything is out and being inspected, this is also a good opportunity to put you in a camping mindset. Practice setting up your tent, packing your bag, freshening up with various knots, etc. Speed is the name of the game. Do yourself a favor and go through at least a couple runs to familiarize yourself with the nuances of everything now than having to try to figure it out in a torrential downpour. This includes those of you who are renting gear from an outfitter. Set up the tent once in their lawn before you head out so you’re familiar with it and also have a good idea for how big it is (another essential when you’re at a campsite and are scouting for the best place to put it). I can’t count how many times I’ve seen people take a half hour to an hour to set up their tent because they forgot how to set it up or the last time they used it they jacked up one of the poles and is nearly worthless.
Want to know what else is worthless? Excess weight.
The last tidbit I’d like to mention is to pack as light as you can. Keep a “less is more” mindset while you go through your clothes, gear, and food. Look for versatility in them. Swimwear is an excellent double for underwear. All natural, non-toxic Castile soap is a perfect option for bathing but also is awesome for cleaning dirty dishes (remember to always bathe and clean dishes away, not in, the water source) – it also can be used as toothpaste. Food is typically the heaviest thing you’ll lug in – plan your meals so that your last day will consist of combining leftover, uncooked items to make a goulash.
Versatility is the name of the game. You’re officially prepped for your big trip. Good luck and Godspeed!! Feel free to ask me any questions you may have in the comments below.
3 thoughts on “Pre-Solo Gear Preparation: Inspect What You Expect”
Everything is very open with a precise description of the challenges.
It was definitely informative. Your site is useful. Thank you for sharing!